技術/運用管理/Vagrant/"Minimal Desktop"インストールのCentOS 6.5のBox作例メモ
技術 / 運用管理 / Vagrant / "Minimal Desktop"インストールのCentOS 6.5のBox作例メモカテゴリ: DevOps Linux Vagrant VirtualBox
技術/運用管理/Vagrant ではUbuntuでBoxを作った時のメモを載せてて、「CentOSならこうなる」的なのを簡単にメモで補足しただけでした。
今回はガッツリとCentOS 6.5で、"Minimal Desktop"インストールで作ったVirtualBoxのVMをBoxにしてみましたので、作例メモを残しておきます。
環境:
Windows7 Pro 64bit 日本語版
VirtualBox 4.3.12
Vagrant 1.6.3
CentOS 6.5 DVD iso イメージ
全体的には、技術/運用管理/Vagrant の参考資料欄にのせた記事を参考にさせてもらいました。
1. VirtualBox上でCentOS 6.5を"Minimal Desktop"タイプでインストールする。
この辺は前回と同じです。今回はVMの名前を以下にしました。
vagrant-centos6.5-x86_64
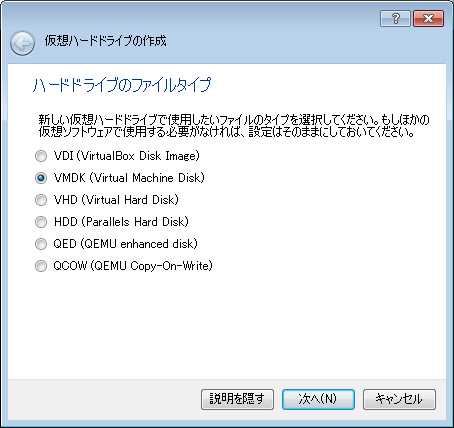
ディスクファイルタイプは"VMDK"にする必要があります:
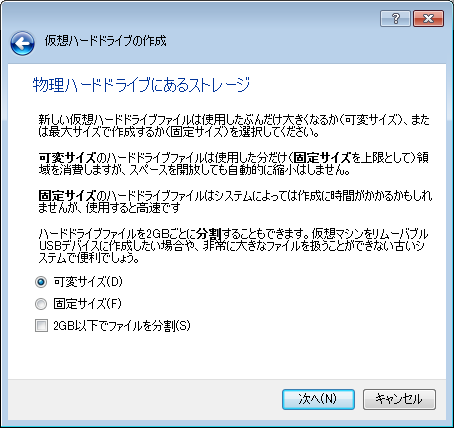
サイズは最大8GBで可変にしました:
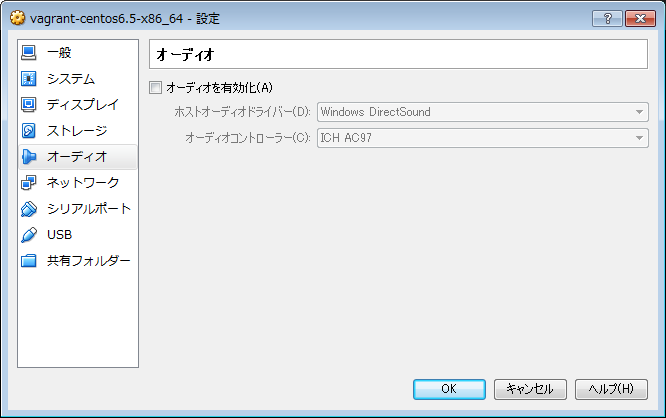
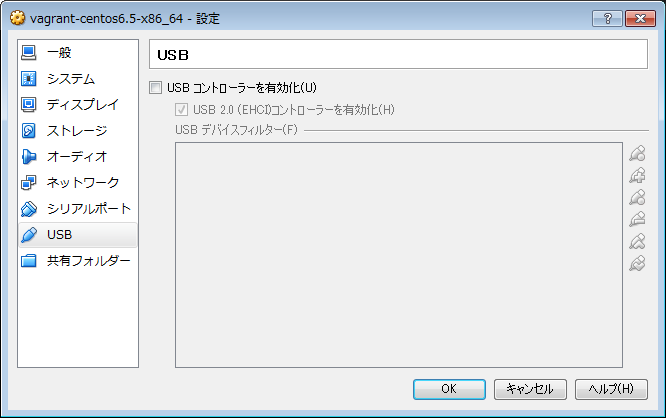
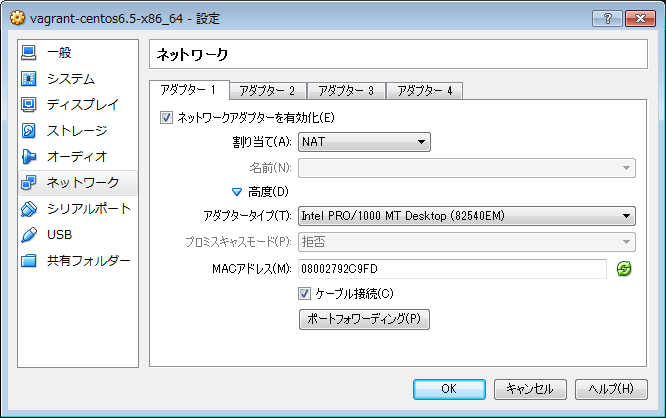
オーディオとUSBをOFFにしました:
ネットワークアダプタの1つめは、NATタイプにする必要があります:
ホスト名は、以下のようにしてみました。
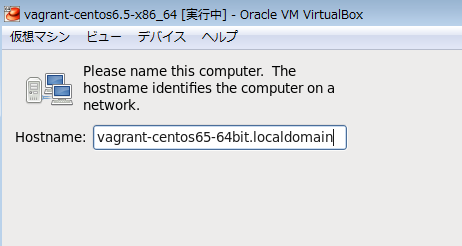
※"vagrant-OS名"のような命名にしてる例を幾つか見かけたので、それに従いました。
例 : https://github.com/fespinoza/checklist_and_guides/wiki/Creating-a-vagrant-base-box-for-ubuntu-12.04-32bit-server
あとはrootユーザのパスワードを"vagrant"にしておきます。
最後にインストールタイプで"Minimal Desktop"タイプでインストールします。
2. インストール後の調整
インストール後に、SELinuxやiptablesの調整、vagrantユーザの追加、sudoの設定、VirtualBox Guest Additionのインストールなどを行います。
今回は"Minimal Desktop"でインストールしたためか、再起動後に、すぐにGUIでユーザ設定などを行う初期設定画面が表示されました。
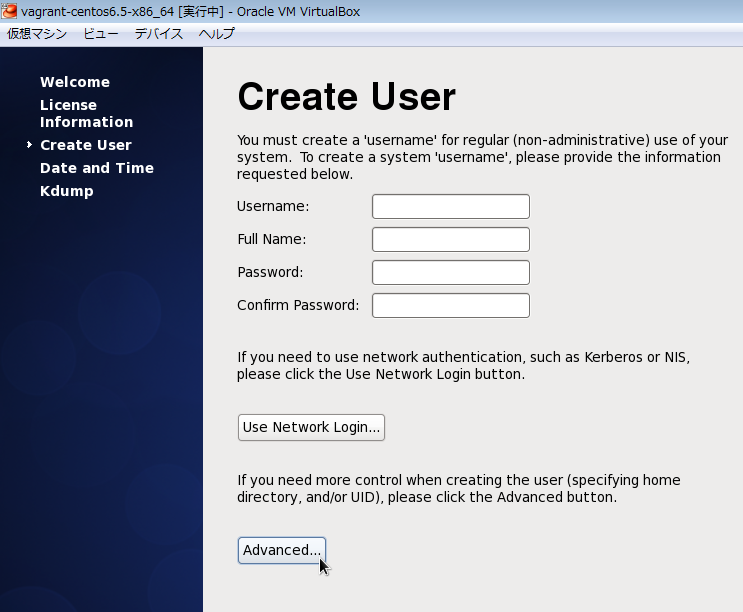
ここでは、後でコマンドラインから確実に追加するため、何も入力せずに(上の画面では切れてしまってて分かりませんが)Forwardボタンをクリックします。
「本当にいいの?」と訊かれてきますが、「Yes」で進めてしまいます。
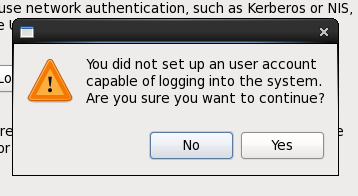
この後はrootユーザでログインします。
iptablesを無効化しておきます:
# service iptables stop
# chkconfig iptables off
# service ip6tables stop
# chkconfig ip6tables off
selinuxも無効化します。前回記事の補足説明や、参考資料を参照してください。
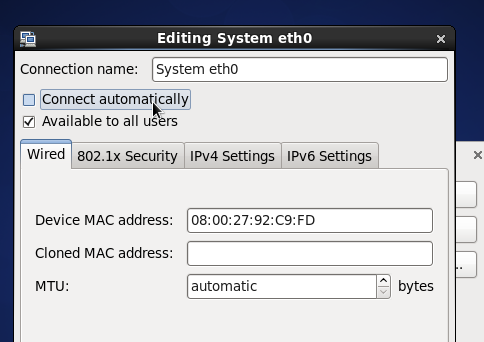
eth0が起動時無効になってましたので、GUIから起動時有効に変更します。
MACアドレスが変更してもethNが変わらないよう、udevの設定ファイルを修正します。前回記事の補足説明や、参考資料を参照して下さい。
SSHを有効にしますが、"Minimal Desktop"インストールタイプでは既に有効になってました。
"admin"グループを追加し、"vagrant"ユーザを"admin"グループに所属させて作成します。
# groupadd admin
# useradd -g admin vagrant
# passwd vagrant
(パスワードは"vagrant"に設定)
ここで一旦再起動して、本当にvagrantユーザでパスワード無しでsudoできるか確認しておきます。
VirtualBoxのGuest Additionをインストールする準備をします。
一旦、システム全体をアップデートしておきます:
$ sudo yum update
開発用のパッケージをまとめてインストールします:
$ sudo yum groupinstall -y "Development Tools"
※今回は"Minimal Desktop"でインストールしたせいか、kernel-headersやbzip2などもインストール済みでした。参考にした記事では、gcc, kernel-devel, kernel-headers, make, bzip2, perl とピンポイントで指定してインストールする例がありましたので、適宜調整になるかと思います。
この後、DKMSを導入する記事もあるのですが、RPMForge追加したりするのが面倒くさそうなのと、ぶっちゃけDKMS無しでも一応Guest Addition入れられたので、無しで進めます。

CentOSにDKMSを入れる参考:
- CentOS 上で Vagrant を導入するまでのメモ(CUI) - Qiita
- VagrantのVirtualBoxで利用するboxを作成 CentOS(6.4) ver. - Done is better than Perfect
こちらは、CentOSにVirtualBoxをインストールするためにDKMSをインストールするパターン
- HowTos/Virtualization/VirtualBox - CentOS Wiki
- http://wiki.centos.org/HowTos/Virtualization/VirtualBox
- 冒頭の強調表示の文章を読むと、バージョンによって大分挙動がドタバタしてそうなので、地雷と認識しました。
- http://wiki.centos.org/HowTos/Virtualization/VirtualBox
- CentOS6 RPMforgeレポジトリ追加とDKMSのインストール : tenten909
- CentOS - 真っ新なPCにVagrantを使って仮想サーバを立てる - Qiita
最後、"vagrant package" で圧縮する前に、キャッシュの削除やDiskのゼロ埋めを行い、圧縮率を高めます。
# yum clean all
# rm -rf /tmp/*
# dd if=/dev/zero of=/EMPTY bs=1M
# rm -f /EMPTY
3. "vagrant package" -> "vagrant box add" -> "vagrant init" -> "vagrant up"
Boxファイルの生成:
> vagrant package -h
Usage: vagrant package [options] [name]

Options:

        --base NAME                  Name of a VM in virtualbox to package as a base box
        --output NAME                Name of the file to output
        --include FILE...            Additional files to package with the box
        --vagrantfile FILE           Vagrantfile to package with the box
    -h, --help                       Print this help

> vagrant  package --base vagrant-centos6.5-x86_64
==> vagrant-centos6.5-x86_64: Exporting VM...
==> vagrant-centos6.5-x86_64: Compressing package to: c:/work/package.box
BoxファイルをローカルのVagrant環境に追加する:
> vagrant box add centos65-64bit-minimal-desktop package.box
==> box: Adding box 'centos65-64bit-minimal-desktop' (v0) for provider:
    box: Downloading: file://c:/work/package.box
    box: Progress: 100% (Rate: 152M/s, Estimated time remaining: --:--:--)
==> box: Successfully added box 'centos65-64bit-minimal-desktop' (v0) for 'virtualbox'!

> vagrant box list
centos65-64bit-minimal-desktop (virtualbox, 0)
hashicorp/precise32            (virtualbox, 1.0.0)
hashicorp/precise64            (virtualbox, 1.1.0)
ubuntu-1204-lts-t1             (virtualbox, 0)
この時点で、以下のディレクトリが作成され、圧縮状態のvmdk, metadata.json, Vagrantfile, box.ovf が展開される。ディレクトリ名が末尾"0"になってるところは多分ローカルのBoxで特にバージョン情報なども入ってないからだと思われる(Vagrant Cloudから追加した場合はバージョン番号になる)。
$HOME/.vagrant.d/boxes/centos65-64bit-minimal-desktop/0
テスト用のディレクトリを作成し、追加したBoxで初期化する:
> cd c:\work\tmp\vagrant_ex
> mkdir t6
> cd t6
> vagrant init centos65-64bit-minimal-desktop
A `Vagrantfile` has been placed in this directory. You are now
ready to `vagrant up` your first virtual environment! Please read
the comments in the Vagrantfile as well as documentation on
`vagrantup.com` for more information on using Vagrant.
この時点で、以下のディレクトリが作成され、Vagrantfileが生成される。
c:\work\tmp\vagrant_ex\t6
ここでVagrantfileに "config.vm.provider" でVirtualBox用のカスタマイズ設定を追加:
# -*- mode: ruby -*-
# vi: set ft=ruby :

# Vagrantfile API/syntax version. Don't touch unless you know what you're doing!
VAGRANTFILE_API_VERSION = "2"

Vagrant.configure(VAGRANTFILE_API_VERSION) do |config|
...

  config.vm.provider "virtualbox" do |vb|
    vb.name = "centos65_md_demo"

    # Don't boot with headless mode
    vb.gui = true

    # Use VBoxManage to customize the VM. For example to change memory:
    vb.customize [
      "modifyvm", :id,
      "--memory", "2048",
      "--vram", "64",
      "--cpus", "2",
      "--audio", "none",
      "--clipboard", "bidirectional",
      "--usb", "off",
      "--usbehci", "off",
      "--nic1", "nat",
      "--nictype1", "82540EM",
      "--cableconnected1", "on",
      "--nic2", "hostonly",
      "--nictype2", "82540EM",
      "--cableconnected2", "on",
      "--hostonlyadapter2", "VirtualBox Host-Only Ethernet Adapter",
    ]
  end

...
end
Vagrantで仮想マシンを起動する:
> vagrant up
Bringing machine 'default' up with 'virtualbox' provider...
==> default: Importing base box 'centos65-64bit-minimal-desktop'...
==> default: Matching MAC address for NAT networking...
==> default: Setting the name of the VM: centos65_md_demo
==> default: Clearing any previously set network interfaces...
==> default: Preparing network interfaces based on configuration...
    default: Adapter 1: nat
==> default: Forwarding ports...
    default: 22 => 2222 (adapter 1)
==> default: Running 'pre-boot' VM customizations...
==> default: Booting VM...
==> default: Waiting for machine to boot. This may take a few minutes...
    default: SSH address: 127.0.0.1:2222
    default: SSH username: vagrant
    default: SSH auth method: private key
    default: Warning: Connection timeout. Retrying...
    default: Warning: Connection timeout. Retrying...
    default: Warning: Remote connection disconnect. Retrying...
==> default: Machine booted and ready!
==> default: Checking for guest additions in VM...
==> default: Mounting shared folders...
    default: /vagrant => C:/work/tmp/vagrant_ex/t6
これによりVirtualBoxのVMが保存されてるディレクトリに以下のディレクトリが生成され、伸長されたvmdkが展開された。
$HOME/VirtualBox VMs/vagrant-centos6.5-x86_64
仮想マシンを停止する:
> vagrant suspend
==> default: Saving VM state and suspending execution...
仮想マシンを破棄する:
(t6のディレクトリにcdした状態で)
> vagrant destroy
→ "$HOME/VirtualBox VMs/vagrant-centos6.5-x86_64" の中のvmdkは削除されるが、フォルダは残っていたので、手動で削除した。
タイミングかどうかわからないが、VirtualBoxのGUIマネージャ上に残ってしまうケースもあった。その場合も手動でGUIマネージャ上から削除した。
プレーンテキスト形式でダウンロード
更新者: msakamoto-sf
更新日: 2017-01-07 22:25:08
md5:b3556c516ec14b8261c14a7501fb5403
sha1:91ef3c95c8d8ce11072277f159792c1169178bc3